The essential first step toward measurement success is understanding just how accurate each of your plant’s instruments needs to be. That understanding, of course, drives what type of instrument is initially purchased, but also how its performance should be managed in order to continue to deliver that accuracy throughout its lifecycle.
To shed some light on the factors that influence accuracy requirements—and what steps are necessary to maintain desired performance—we caught up with Robert Jennings, calibration and repair manager for Endress+Hauser in the United States. Now based in La Porte, Texas, he’ll soon manage the company’s calibration and repair services out of a new $38.5 million, 112,000-sq.ft. campus under in Pearland’s lower Kirby District near Houston.
Q: Determining how best to ensure that one’s instruments are performing as expected is not as straightforward as one might think. More frequent calibrations than necessary can waste resources and introduce downtime and risk, while too few can adversely affect safety, regulatory compliance, product quality and overall profitability. As a first step in an optimal instrumentation management plan, how do I go about determining just how accurate the instruments in our plant need to be?
A: The first step is to perform a plantwide assessment of all your instrumentation. First, identify and make a list of all the equipment parts and all instrument-related systems. This list should include details such as description, location information, operating conditions, working range and history, and any other points that provide a better understanding of the instrument and system function.
Next, evaluate each instrument’s criticality along three dimensions: to the end product; to the process operations; and to protecting workers, the environment, and production assets.
The first category—instruments critical to the product—are those that affect product quality, sometimes with regulatory compliance implications such as for aseptic systems. We start here because these instruments have a direct link to company profits, whether it involves providing a consistent mix of ingredients for a food processing application, gauging the completion of a batch chemical reaction or successfully fulfilling the terms of a custody-transfer agreement.
The next category—instruments critical to the process—are those that can upset or shutdown the overall plant or other processes. These instruments can cause inefficiencies and production losses, but do not have a direct effect on product quality or safety.
Instruments deemed critical for their protective role have a direct impact on operator safety, the environment or integrity of production assets. Often, they do not have to be extremely accurate, but they have to function properly and reliably.
Finally, non-critical instruments have no impact on product quality, the overall process or protective measures. These types of instruments are often only used for local or remote monitoring or when manual operations are performed.
After all instruments have been identified and classified into these four categories, a maximum permissible error (MPE) is assigned to each device based on the consequences of its inaccuracy. A critical instrument will usually have a more stringent MPE than a non-critical one. The necessary calibration interval, then, is all about making sure that the instrument continues to perform its critical functions and maintains that performance within the prescribed MPE.
Application-specific factors to be taken into account include the nature of the product being measured, the continuity of the process (continuous use or intermittent use), the need for clean-in-place (CIP) operations, the severity of process impacts and how easy it is to access and remove the instrument for calibration. In some cases, it may only be possible to access the instrument during a complete process shutdown.
If you can show an auditor or other responsible entity that a non-critical instrument has no effect on product quality, safety or the environment, and its MPE is relatively high, then you can claim there is little or no need for periodic calibration. Conversely, critical instruments should be calibrated at intervals appropriate to maintaining critical product quality, process operations or protective functions. Keep in mind that those instruments deemed critical to safety or the environment often have their calibration frequency dictated by regulatory requirements.
Q: Verification is often cited as a way to ensure the proper operation of instruments without removing them from the process for a full-blown calibration. Can you explain how verification works, and how it is different from calibration?
A: The most important distinction is that while calibration is quantitative, verification is qualitative. Verification should not be confused with calibration since it doesn’t compare the accuracy of an instrument against a reference, nor is it used to adjust the calibration factor of the instrument. That being said, verification provides a high degree of confidence that the instrument is operating in accordance with its original specifications based on testing of key internal components.
Verification is done in-line with minimal or no process interruption using the verification functionality embedded within the latest generation of instrumentation or, in the case of older instruments with little diagnostic coverage, using specialized tooling. More recently developed instruments include automatic checks of their own health, providing a continuous source of confidence that the instrument is functioning as intended.
In-line verification improves plant availability because there is no need to dismantle the instrument for calibration. This eliminates the risk of damage of during removal or transportation, and removes the potential for mistakes to be made during reinstallation. And, when performed periodically, verification allows the operator to track the instrument’s performance over time. This can provide early notice of an increased risk for measurement drift of the instrument, giving additional confidence in the current performance of the instrument—or early warning of the need for an unscheduled calibration.
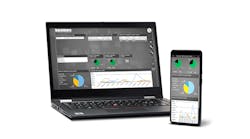
For example, Endress+Hauser’s latest generation of smart instruments with Heartbeat Technology offer significant reliability and safety advantages, verification convenience and enhanced opportunities for calibration flexibility. These instruments continuously check their own health with a best-in-class diagnostic coverage typically exceeding 95%. Instrument failures that could cause malfunctioning of safety systems are significantly reduced. Consequently, the risk of an undetected dangerous failure being present in an instrument is extremely low.
Heartbeat Verification enables instruments to be verified locally at the push of a button or remotely via higher-level systems without process interruption or the need for additional tooling. Heartbeat Verification is certified by TüV to be a traceable verification method according to ISO 9001. The automatically generated verification report is in accordance with the IEC 61511 user functional safety standard and consequently meets compliance requirements while reducing documentation effort.
Q: Can instrument self-diagnostics and verification help to extend instrument calibration and maintenance intervals? What about proof-testing for safety instrumented systems?
A: Confidence from the continuous diagnostic test coverage, together with easily performed periodic verifications, provides many users the flexibility to extend the calibration and proof-testing cycles of their instrumentation, thereby saving time, effort and costs while maintaining safe operations.
The IEC 61508 functional safety standard refers to the probability of failure on demand (PFD) as the basis for instrument reliability. Together with instrument PFDs demonstrated to remain low for extended periods of time, Endress+Hauser’s Heartbeat Technology permits many users to extend the instrument proof-testing intervals in their safety instrumented systems.
It bears repeating that dismantling and removing an instrument from a process for testing or calibration introduces additional risk by handling the instrument. Most often, the user already knows that the instrument is probably working properly and safely but is required by internal or external regulations to ensure and document the instrument’s functionality at regular intervals. Here, in-line verification can be of significant value, helping to extend more intrusive calibration intervals and saving both time and effort.

Leaders relevant to this article:


