By David W. Spitzer
Measuring the level of solids such as plastic pellets, coal, coke or flour is not necessarily easy, and the difficulty starts before the measurement system is even designed. Simply put, why are you making this level measurement? Do you want to measure the level in the bin or hopper or the amount of material? These two questions may appear to be same—but their implications can be quite different.
To put things in perspective, consider the measurement of water in a tank. The water will tend to fill any voids below the surface, so its surface will appear to be horizontal. The water level is the same at all locations in the tank, so the liquid level can be measured anywhere in the tank. The liquid level measurement and tank dimensions can then be used to calculate the amount of water in the tank. In this application, the amount of water in the tank can be inferred from the level measurement. Conversely, weight measurements could be used to infer the water level.
The Solids Challenge
Measurement of solids is not so straightforward. For starters, solids typically do not flow downward as freely as water, so their level will vary in the bin. Ratholing tends to occur when solids are removed from the bin because the material is removed from the space directly above the point of removal. Material above this point will typically move downwards and out of the bin, but material farther (horizontally) from the point of removal will not readily flow to fill the void that is formed above the point of removal. Under these conditions, level measurements made directly above the point of removal will reflect neither the level nor the amount of material in the bin.
Bins are often designed with their feed points above their point of removal, so material entering the bin will tend to fill the rathole formed by material exiting the bin. However, when the rathole becomes large, its sides can collapse and fill in part or all of the rathole. In addition to reflecting neither level nor the amount of material in the bin, level measurements made directly above the point of removal can increase 10% to 20% within seconds! Weighing the bin can avoid these complications and measure the amount of material in the bin. However, ratholing and other effects can cause weight measurements to infer the level in the bin incorrectly.
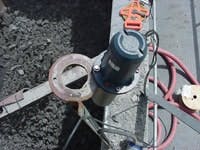
Figure 1. Laser Level Measurement in a bin.
Photo by Courtesy K-Tek
Simply put, solids level measurement systems can exhibit significant errors—even when their level transmitters measure level perfectly and without error—so the level transmitter should be strategically located to reflect the desired level or amount of material.
Bins with non-uniform shapes can complicate level transmitter location. Further, additional level transmitters may be installed in applications when accurate level measurement is required.
What Do You Want To Know?
Joe Lewis, vice-president of marketing and sales at Monitor Technologies, says users need to be clear about what they really want.
“Level measurement of bulk solids is often for inventory management purposes, and there is often a disconnect between level measurement and the expectations of people have in the user organization,” Lewis says. “Many customers want to know the amount of material, so the level measurement provides an input to calculate mass. But how accurate can the mass measurement be in a silo that (at best) is cylindrical with center fill and discharge? The accounting department expects 100% accuracy, but operations show mass balances with losses.
“I contend that the level measurement supplier does not necessarily know the accuracy of the calculated mass in the bin because so many factors outside of the level measurement device cannot be defined. A few examples include the flow characteristics in the silo, angle of repose, sensor location, material properties, and fill and discharge locations. In other words, user expectations may not be met, and there can be significant problems even if the level is measured perfectly and without error. Customer goals and expectations should be discussed before a particular level technology or supplier is selected.”
Valentine “Tiny” Sonnier, product manager for ultrasonic level products at Siemens Energy and Automation adds that, “The properties of the material cannot be underestimated. The angle of repose of a material is the angle at which a stack of material will form when filling and be maintained when emptying. Each material has its own angle of repose dependent upon its properties and, to some degree, the bin geometry. Therefore, the location of the measurement is critical because moving the measurement only a short distance can result in a different level measurement due to the effects of ratholing or bridging.”
Sonnier notes that neither contact nor non-contact level gauges can determine whether there is ratholing or bridging in the hopper. In this sense, non-contact level gauges are just as accurate as contact level gauges.
Ultrasonics and Lasers
John Mikos, instrumentation technician at ArcelorMittal I/N Kote in New Carlisle, Ind., uses ultrasonic level transmitters in powder applications. He agrees that the angle of repose and ratholing can be problems. He mitigates part of the problem by calibrating the level transmitter zero to be at or just above the top of the cone on the bottom of the hopper. By not attempting to measure the level in the cone, the non-linearity associated with the relationship between cone level and the amount of material in the cone is eliminated. The level measurement is more stable because the process doesn’t to operate in the cone where rathole and filling effects would be more prevalent.
For Catherine Steukers, asset manager of the polystyrene and Styrolux plant at BASF, Antwerp, Belgium, measuring the level in hoppers containing various types of plastic granulate isn’t optional.
“We need the level measurement to know how many tons of product we have in storage,” she says. “Accurate level measurement allows us to fully utilize the hoppers to their maximums. Also, the laser can be pointed to the exit of the hopper to ensure that the cone is empty. Despite the ability to point the laser, there is always some inaccuracy in the amount of plastics remaining.”
Installation Guidelines
General guidelines for installing ultrasonic and radar level gauges include mounting them about one-third of the diameter from the hopper wall. Sonnier suggests that “The ultrasonic sensor initially should be aimed at the discharge point and positioned with an aiming device so as to increase signal strength. In general, the return signal will be strongest when the sensor signal is perpendicular to the angle of repose of the material.”
Eduardo (Eddie) Yi, electrical engineer for the Aggregate Division of Cemex Florida, in Miami, is quick to caution that not all vessels are symmetrical.
“We need to measure the level of aggregate in vessels that can have multiple draw points,” he says. “With three draw points, the cone bottom may exhibit ratholing and bridging at the same time. What the instrument sees could be very different than what a person sees. Sometimes a vessel with a 50% level measurement appears to be only 30% full when viewed by a person. Therefore, level technologies with small beam sizes may not work as well as those with larger beams.”
However Ivo Radanov, laser level product manager at level measurement systems maker K-Tek, points out that “Laser light energy is scattered from the material surface in all directions. This means that laser level measurements are independent of the angle of the material encountered by the laser beam because part of the scattered reflection will return to the sensor,” thus mitigating signal strength issues in many applications. (See “Lasers Come to Level Measurement,” Control, Feb., 2006.)
Mikos handles this phenomenon by mounting his ultrasonic transmitter to measure vertically approximately midway between the center of the tank and the tank wall.
De-Rating Ultrasonics
More powerful ultrasonic signals are necessary for solids applications as compared to liquids, so many suppliers de-rate their ultrasonic systems when they are used for solids. Most suppliers de-rate by a factor of two; that is, a 60-meter system for liquids would be de-rated to 30 meters for solids. However, Sonnier typically de-rates his ultrasonic equipment by a factor of three to account for material properties, dust and similar problems that degrade signal strength. He also cautions users to be sure that the transceiver can handle the next-sized sensor—just in case an unexpected problem surfaces that requires more power.
Ultrasonic level transmitter ranges may also need to be de-rated due to noise. Some of Yi’s applications “Include metal tanks that can be so noisy when filled with granular material that the acoustic noise drowns out the ultrasonic signal to the extent that the level transmitter fails to operate until the filling operation is stopped. Higher power transducers should be used in these applications.”
Application knowledge is important to help determine which technology is applicable. Between ultrasonic and radar level measurement, Sonnier tends to supply ultrasonic level gauges for applications that are under approximately 7.5 m (25 ft) and radar level gauges for applications over 15 m (50 ft). Technology selection for ranges between 7.5 m and 15 m typically is not related to distance, but rather other factors, such as the bin type, bin shape, material properties and the like. Further, ultrasonic level gauges usually exhibit a price advantage over radar level gauges, except that power requirements for longer ranges tend to increase the pricing for the ultrasonic solution, making the radar level gauges more attractive for long-range applications.
Radanov agrees. He points out, “Laser technology can be applied to measure level using a narrow beam at long distances (as far as 120 m) for any solid surface at any angle, which makes the application less application-dependent. Installation is generally simpler because virtually any existing nozzle size can be used, and the narrow beam allows installation near the wall of the bin. Laser level transmitters can also measure into the silo cone and chute to ensure that the bin is completely empty. This ability is important in many plastics and food-processing applications in order to avoid cross-contamination between campaigns. In addition, scanning laser transmitters are able to measure the non-uniform profile of the material and calculate the volume of material in the bin. This ability differentiates it from other solids level measurement technologies.”
Steukers found that the setup for radar level gauges can take three hours or more per hopper, depending on material properties and the number of false reflections received—especially with plastics that have relatively weak reflections. In contrast, “Laser level gauges are not dependent on material properties, so the configuration for one hopper can be transposed to identical hoppers and operation is more reliable—even for different types and colors of plastics. In other words, product properties are not a problem for us with this technology.”
Mikos advises users to remember practical matters when dealing with solids. In particular, some “applications utilize intermittent vibrators to keep the material from plugging. But do not get carried away with too much of a good thing because running the vibrators all the time will pack our material too hard and cause it to plug.
Also, be cognizant of the battery backup features associated with your equipment. Some of our ultrasonic transmitters are almost 10 years old, so the on-board memory backup battery is near the end of its service life. We now have to replace these batteries to avoid the potential of configuration loss in the event of a power failure. This can pose significant problems during both extended and intermittent power failures.” Overall, Mikos notes that this technology has improved to the extent that he notes fewer problems such as caused by false echoes.
Steukers also had some practical problems with level transmitters. Dust would stick on the laser and cause a loss of measurement. It appeared that the manner in which the dust tube was purged was incorrect, she reported, “so an improved dust tube purge was installed that now appears to keep the laser clean and eliminate the loss of measurement.”
It should be clear that measuring the level of solids can be perplexing. Measurement errors can occur even when the level transmitter measures perfectly and without error. In many applications, solids level measurements are simply “good enough” for the application.
David W. Spitzer is a principal in Spitzer and Boyes, LLC. Contact him at 845.623.1830 or www.spitzerandboyes.com.

Leaders relevant to this article:


